Categorized in:
New User Training | Cvent
January 28, 2025 by Melanie Jones
Get started by learning to create your first Cvent event.
Get Started | 0:00 - 10:40
- Login
- Help & Support | Cvent not only provides a large knowledgebase to search step-by-step tutorials but support you can contact directly. Request a call, instant message, or submit a case.
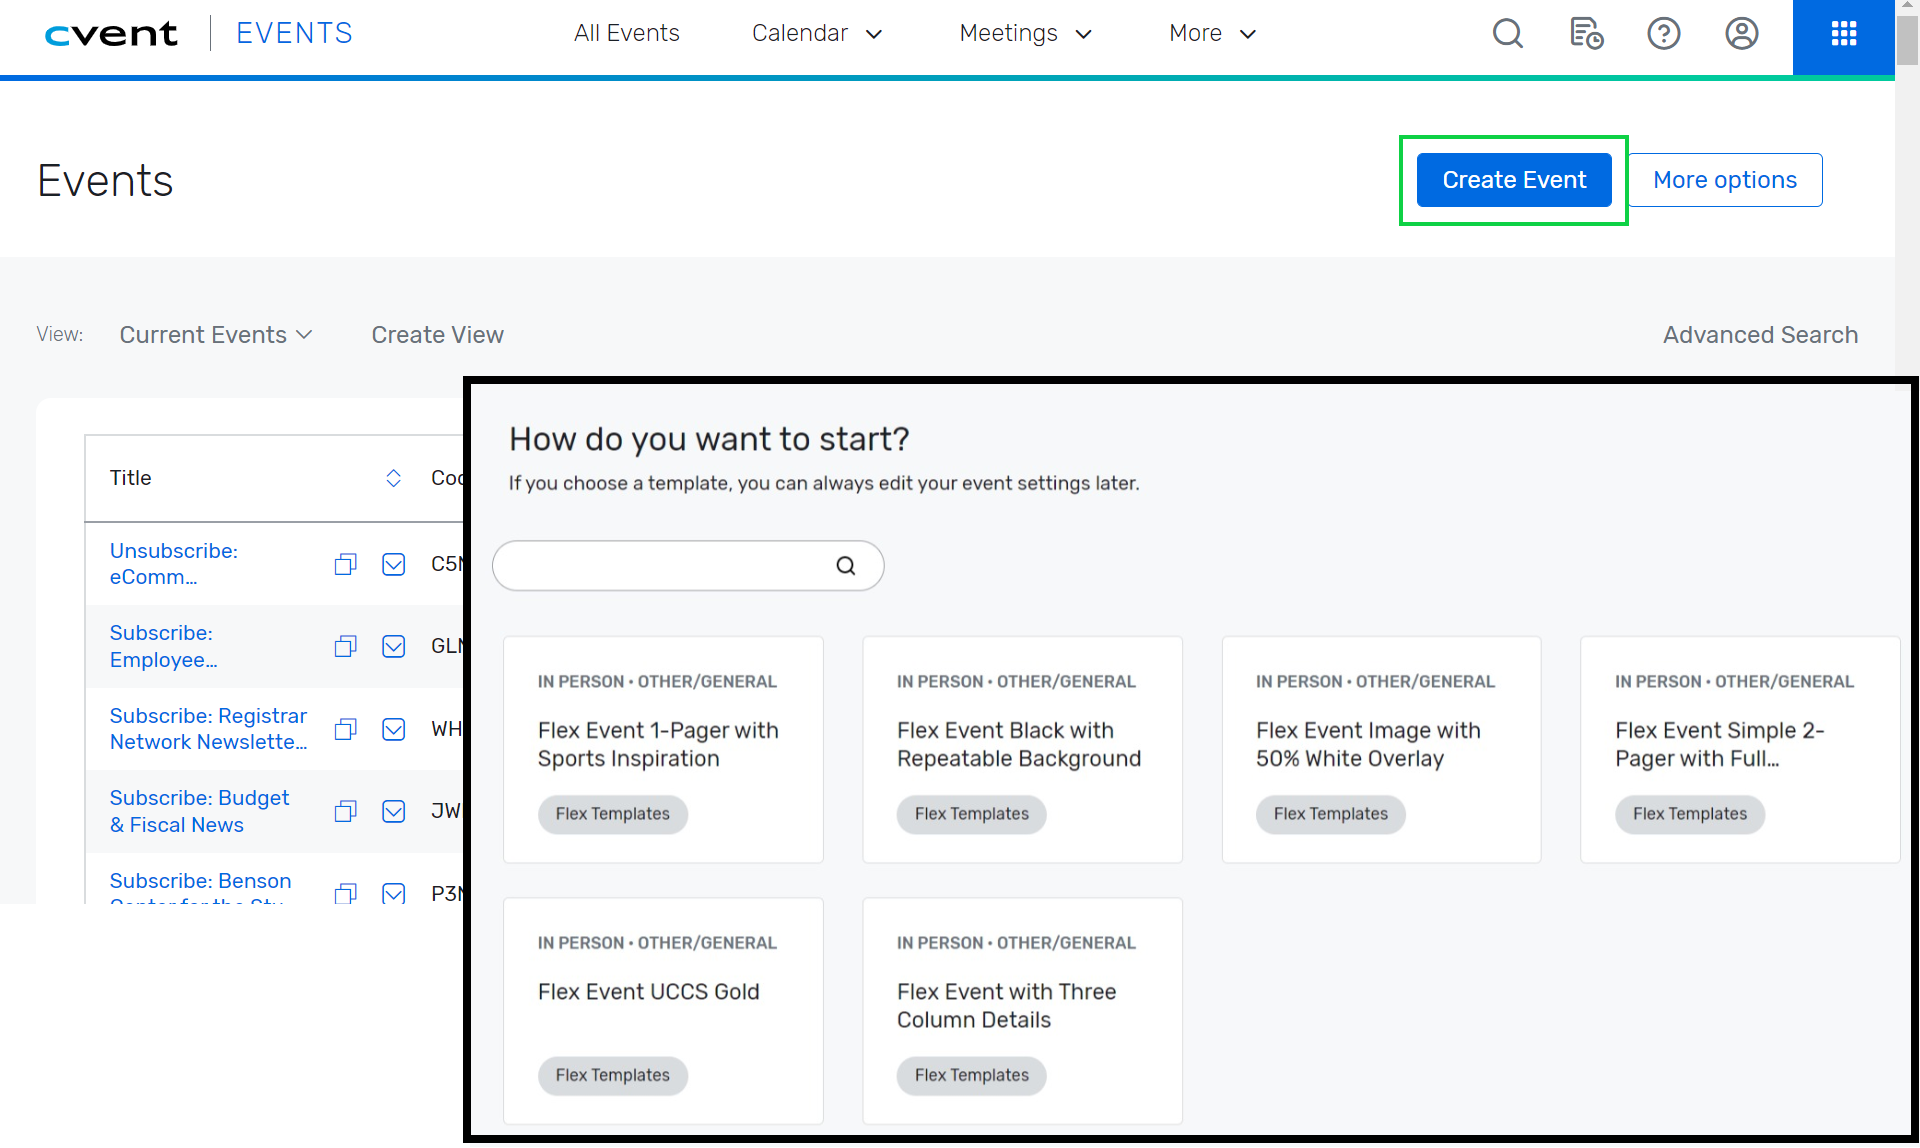
- View Templates | We've made six different CU-branded templates available to all users to clone. They provide a great start but can be fully customized.
- Create Event | The event creation process starts with providing basic event information (title, date, location, etc.). Once created, enable additional features like guest registration, sessions, or speakers before customizing further.
- Start by clicking the blue Create Event button in the top-right corner. Next, you will be able to select a CU-branded template to clone. Alternatively, you can clone an existing event you have access to.

General | 10:40 - 13:39
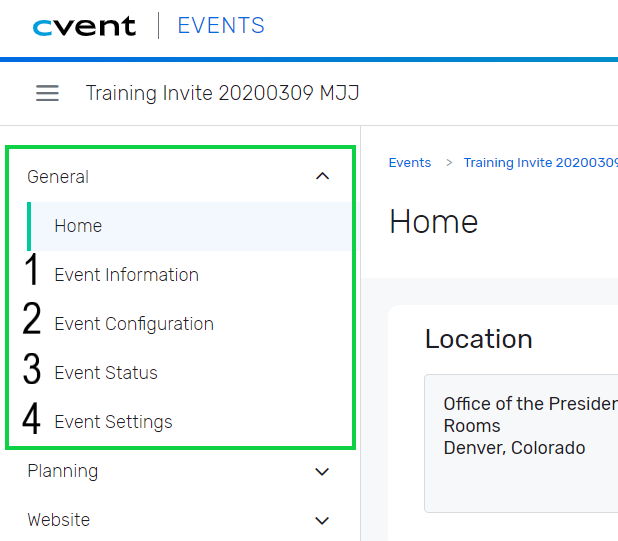
- Event Information | For your basic event details, such as: event title, start/end date, event planner, etc.
- This also includes our Custom Contact Fields which play a role in getting money to your account if you're hosting a paid event.
- Event Configuration | For enabling additional event features, like: guests, sessions, speakers, social media, etc.
- Event Status | For testing your event and requesting approval from your eComm specialist.
- Event Settings | For sharing your event with other Cvent users.

Website & Registration | 13:39 - 23:55
You can open the Site Designer to customize your website and registration process in two ways. In the left navigation, either:
- Click Event Website after expanding the Website section.
- Click Registration Process after expanding the Registration section.
Each path will present you with a blue button to the Open Site Designer.

Marketing & Email | 23:55 - 29:48
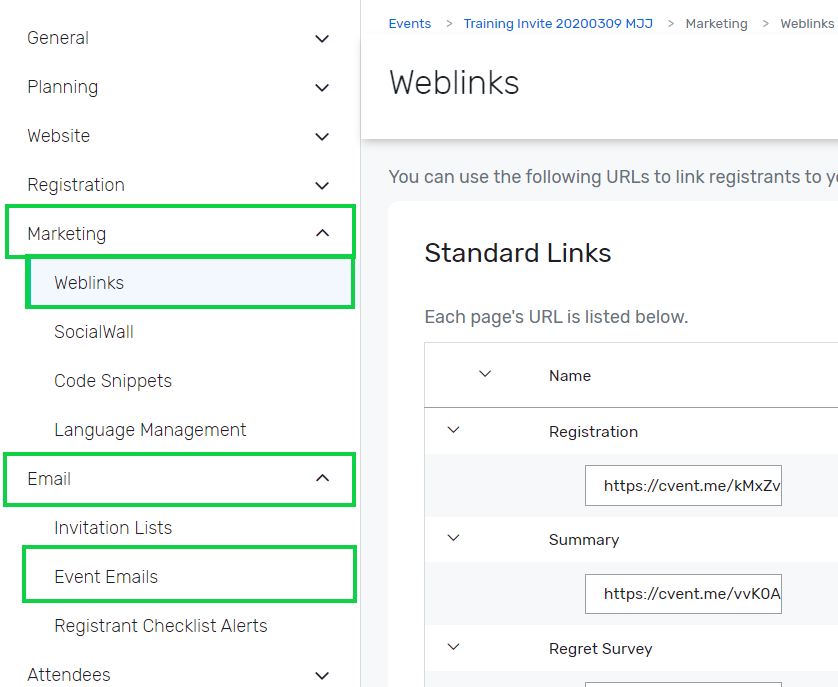
- Weblinks | Weblinks can be found after expanding the Marketing section.
- Emails | Event Emails are found after expanding the Email section.

Attendees & Reports | 29:48 - 31:08
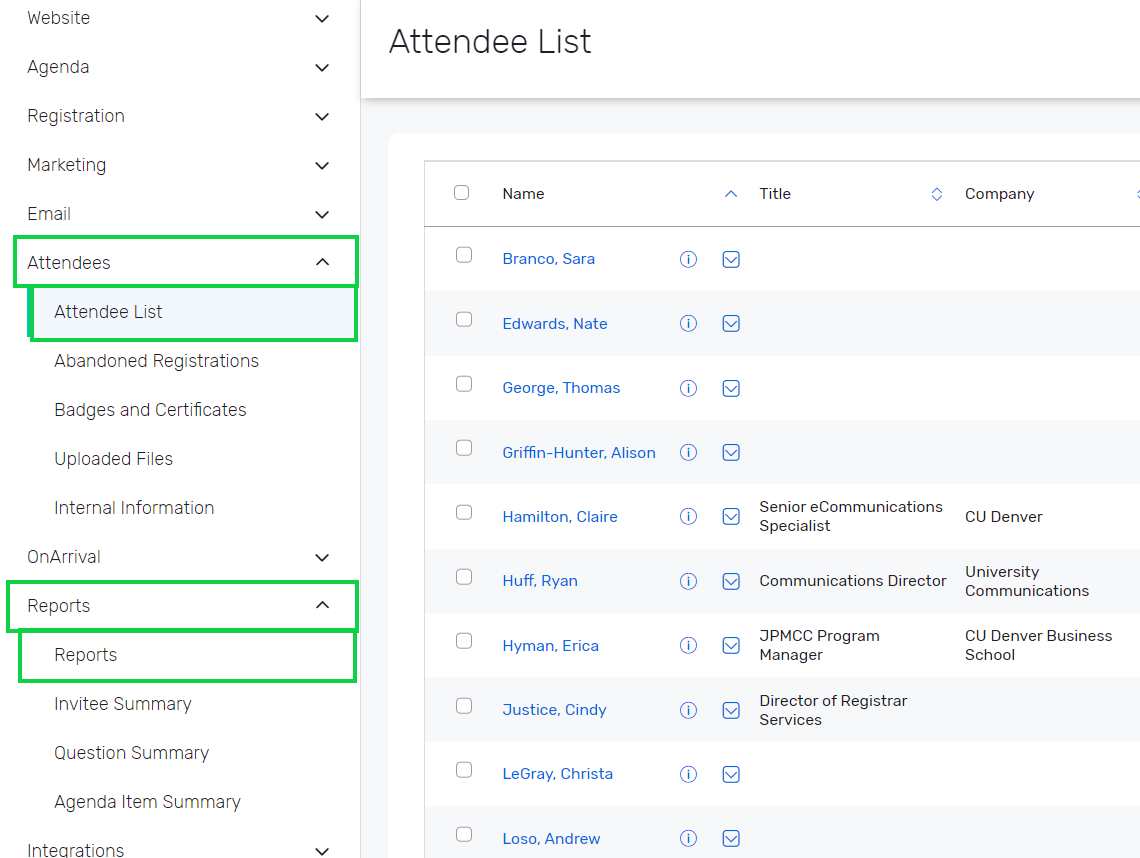
- Registrant Management | Attendee List found under Attendees present a list of registrants to view, search and modify.
- Reports | Reports under the Reports section can provide details on registrants, email engagement, financials and more.
- Report Portal | Take it a step further by working with your eComm specialist to get Reports published to the Portal so others can view and export Reports in real-time, for free.

Test, Request Approval & Launch | 31:08 - 33:30
Once your event has been customized you can move into the testing phase, replicating the registrant experience. Once finalized, send a request for approval to your eComm specialist. After they review and approve your event, you will be able to launch your event.
Expand the to General section, then click Event Status
- Testing | The List found under Attendees presents a list of registrants to view, search, and modify.
- Request Approval & Launch | All events must be approved by an eComm specialist before you'll be able to launch them.
Test your knowledge with the quiz below.


