


Create and Manage Content
Overview
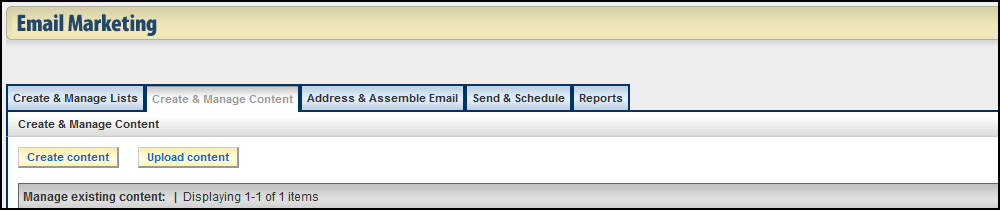
In the Email Marketing tool, click on the Create & Manage Content tab.
Your account will have pre-loaded email template(s) ready for you to use. Look for the content with the label TEMPLATE in the name. NOTE: These templates are consistent with CU brand standards. If you require a different template, review the email template page and contact your campus manager.
Create New Content
- Click Create & Manage Content tab
- Find the template in the Content Name column that you would like to work with. Templates are based on the type of email you plan to send (newsletter, event invite).
- In the Action column in your chosen template’s row, click Duplicate. You will be directed to a new page. Please make sure to duplicate a template each time you are creating a new email. This allows you to make a mistake and always have the backup template to use if that is the case.
- At the top of the new page, make sure to name your email in the Name this content text box. Choose a name you will remember and that will be helpful for you (i.e. December Event Newsletter_12082011).
- Click the Save content button at the bottom of the screen.
Edit Content
Editing your text in Harris
- Edit the body of your email in the Harris editor by changing current text and updating copy to make it specific to your department/school. NOTE: The header and footer need to remain due to University of Colorado brand standards. Anything in between can be modified.
- In the editor window, you can customize the existing text as well as insert hyperlinks, data tags, contact info, etc.
- Once all done with the HTML editing, click the Copy HTML to Text version button on the right of the screen.
- Visit the blue Text Version tab after doing this and edit the content in this tab to make it more user-friendly. Anything you modify/delete in this tab will NOT affect the HTML Version tab.
- Save and save often. Click the Save Content button at the bottom of the screen throughout your editing process.
- As you make your updates/additions, click on the Preview HTML button to check your work. This will open a new window. Check your hyperlinks, photos, spelling etc. Close this window once you’ve completed reviewing your work.
Editing your text in Microsoft Word
If you are inserting copy that was created in a Word document, there are some special instructions you will need to follow.
- Place your cursor within the Harris editor where you want your content to go
- Click the Paste from Word button in the editor toolbar. A new dialog box will open
- Copy the content from Word and paste it into the Paste from Word text box
- Check both Ignore Font Face definitions as well as Remove Styles definitions
- Click the OK button
- Follow the steps 3-6 from the Editing your text in Harris section above.
Important notes about content
- Do not delete the unsubscribe link or the open count data tag at the bottom (footer) of your email.
- Remember that content is always required on the Text-only content page. If your email isn’t saving properly, check this component.
Add Image
Using Microsoft Office Picture Manager
- Open Microsoft Office Picture Manager
- You should see a list of folders that contains images on the left side of the window. Click on the folder that contains your image and you should see your image in the main part of the window.
- Double click on your image so that it fills the entire main part of the window. Then click on the Edit Pictures button located near the top center of the window.
- Along the right side of the window, about half way down, click on the Resize link.
- Along the right side of the window, type the new width for your image in the width box. As you type, you will notice that the program will calculate the proportionally correct height for your image and display this information further down the page. TIP: Email templates are designed to be 600px wide. Header images and other wide images you want to display the entire width of your email, save with a width of 600px.
- Click on the OK button after you have entered the new dimensions.
- Click on File in the menu bar at the top of the window.
- Click on Save As. This will allow you to save your new image with a different file name so that your original image with its original size is not lost.
- In the Save As window, type a new name of your resized image.
- Double check the save location and then click on Save button to save your new image.
- When you Quit or Exit the Picture Manager program, it may ask you if you want to save changes you made to your original image. Please click on NO so that your original image is not changed.
- Open Adobe Photoshop
- Click on File, then Open.
- Find the image file on your computer, select it and click the Open button.
- Click on File, then Save for Web & Devices. A pop up box will appear.
- Make sure JPEG is selected as the file type.
- The Quality dropdown menu should be set at 60.
- Under Image Size, select an appropriate width. Photoshop will keep your image in proportion so the height will change automatically. TIP: Email templates are designed to be 600px wide. Header images and other wide images you want to display the entire width of your email, save with a width of 600px.
- Click on the Save button after you have entered a new width.
- Find a location to save your new image file.
- Provide a web-friendly file name (no spaces in between the words).
- Click on Save button.
- When you Quit or Exit Photoshop, it may ask you if you want to save changes you made to your original image. Please click on NO so that your original image is not changed.
Inserting an image into your email
- Place your cursor within the Harris editor where you want your image to go.
- Click on the Open File Manager button (3rd grey button above the editor). A pop-up window will appear.
- Click on your campus and find your school, department or unit’s folder.
- Click the Upload Files button. NOTE: If asked, make sure to click “Run” or “Accept” when prompted by Java.
- Click the Browse button and locate your image. Once your image is located, click the Open button.
- Click the Upload button and the picture will be added to your folder.
- Click Continue.
- Once your image(s) are in your File Manager folder, click the Insert image into HTML link located to the right of your photo in your folder. The photo you choose will be inserted where you left your cursor in step 1.
Editing your image in Harris
Now that your image has been added to your content, you may need to format it.
- Click the image (so there are boxes around it) and then select the Insert/Edit image button in the editor OR right click and select Image Properties. A pop-up window will appear.
- Add alternative text in the Alternative Text text box so that a description of your image will display if a recipient does not receive or download images in their email client
- If you want to scale your image, insert a size into either the Width or Height box. The tool will automatically adjust so the image remains proportioned. Use the sparingly. Resize your images outside the Harris tool.
- To add a border around your image, simply type a number in the Border text box (1, 2, 3….)
- To add spacing around the image, type a number in the HSpace (adds padding to the top and bottom of your image) and VSpace (adds padding along the sides) text boxes
- To align your image on the left or right side of your email and have your text content wrap around it, select left or right from the Align drop down menu. To center an image, click the OK button at the bottom of the Image Properties window. Click on the image and then click the center text icon in the editor.
- When finished, click the OK button.
Additional Features and Functions
Allow recipient to view larger newsletter image
How to have a larger version of an image appear when a recipient clicks on an image in your newsletter
- Upload the smaller sized image you want to use in your email content into the Harris file manager
- Follow the same procedures you would to insert that image into the body of your email message
Now here are the additional steps you need to take:
- Upload the larger sized image into the Harris file manager. Remember that it still should not be too large. Good rule of thumb is no wider or taller than 1500px and definitely not bigger than 800 kilobytes.
- Once the larger image is uploaded into File Manager, click on Get URL for that image
- Copy and paste the URL in the white text box (should look something like this “http://www.alumniconnections.com/olc/filelib/UCO/email/….”)
- Close out of File Manager and go back to your email content
- Find the smaller image that you just inserted into the body of your email and right click on it
- In the menu, select Image Properties
- A dialogue box will appear and the default tab you land on is the Image Info tab. Instead, select the Link tab
- In the URL text box, paste in the larger image URL you just copied
- In the Target dropdown menu, select New Window (_blank)
- When finished, click the OK button
Add anchors to your email
- In the Harris editor window, place your mouse cursor where you want your anchor to go (this will be where the recipient it taken then he/she clicks on the link)
- Click the Insert/Edit Anchor icon
- Give the anchor a name and click the OK button
- In your table of contents, highlight the article/story title associated with the anchor you just created and click the Insert/Edit Link icon. A pop-up window will appear.
- In the Link Type drop down menu, select Link to anchor in the text
- In the Select an Anchor By Anchor Name drop down menu, select the anchor you created in step 3
- Repeat steps 1-6 until all anchors are created.
Add rows to your table of contents
- In the Harris editor window, take your mouse and click on the very last row of the “In this issue” section. It can be either next to the arrow shaped bullet point or the name of the story.
- Right click and a menu will appear. Hover your mouse over Row and select Insert Row After.
- A blank row will appear. To get a bullet point on the next row, simply highlight a bullet point, copy it and then paste it in the empty row below in the left hand cell.
- The right hand cell is where you will type in the title of the story
- If at any point you make a misstate, use the back button in Harris or Windows: Ctrl+Z or Mac: Command+Z on your keyboard
Create email friendly newsletter with link to full
- Create two versions of your newsletter in Harris
- Open the long version in Harris
- Complete all edits until you have a final copy
- Click on the Source button
- You will see a lot of HTML coding – select it all and copy it.
- Open up Notepad++ or another HTML editor of your choosing (Microsoft Frontpage)
- Click File, then New
- Paste your newsletter HTML code into the new document
- Click File, then Save As
- Give the file a name and select “Hyper Text Markup Language file .html” from the Save as type drop down menu
- Go back to Harris. Open the File Manager and find your folder
- Upload your recently saved HTML file from step 10
- Once the upload is complete, find the HTML file in your folder and select Get URL
- Copy the URL in a text document
- Exit your Long Version and open up the shorter email version
- Start at the top and find the first read more link. Highlight the text “Read more” and make it a hyperlink
- In the hyperlink dialogue box, paste the URL from step O in the URL text box
- At the end of the URL, add #nameofanchor (so it will look like: http://urltoyourlongernewsletter.com#anchorname)
- Repeat steps Q through S for each of your Read more links until you are done.
NOTE: If you have to make changes to the longer version after you have completed this process, you will have to redo steps 1 through 12. Make sure you give the updated longer version the exact same file name as the previous version. In Harris’s File Manager delete the old HTML file and replace it with the new one.
Include PDF flyer in your email
Link to a downloadable copy of your PDF
- Click on the Open File Manager button (3rd grey button above the editor). A pop-up window will appear.
- Click on your campus and find your school, department or unit’s folder
- Click the Upload Files button. NOTE: If asked, make sure to click “Run” or “Accept” when prompted by Java.
- Click the Browse button and locate your PDF file. Once your PDF is located, click the Open button.
- Click the Upload button and the PDF will be added to your folder.
- Click Continue.
- Once your PDF is in your File Manager folder, click the Get URL link located to the right of your PDF in your folder.
- In your email content, highlight the text you want to hyperlink to your PDF.
- Click the Insert/Edit LInk icon. A pop-up window will appear.
- Paste in your PDF URL into the URL text box.
- Click the OK button.
Insert your PDF as an image
Converting your PDF to an image
- Open Adobe Photoshop.
- Click on File, then Open.
- Find the PDF file on your computer, select it and click the Open button.
- Click on File, then Save for Web & Devices. A pop up box will appear.
- Make sure JPEG is selected as the file type.
- The Quality dropdown menu should be set at 80.
- Under Image Size, select an appropriate width. Photoshop will keep your image in proportion so the height will change automatically. If you want your email to only consist of your PDF flyer, select a width of 600px. If you want only want a thumbnail of your PDF, select a smaller width.
- Click on the Save button after you have entered a new width.
- Find a location to save your new image file.
- Provide a web-friendly file name (no spaces in between the words).
- Click on Save button.
- When you Quit or Exit Photoshop, it may ask you if you want to save changes you made to your original PDF. Please click on NO so that your original image is not changed.
Inserting your new PDF image into your email
- Place your curser within the Harris editor where you want your image to go.
- Click on the Open File Manager button (3rd grey button above the editor). A pop-up window will appear.
- Click on your campus and find your school, department or unit’s folder.
- Click the Upload Files button. NOTE: If asked, make sure to click “Run” or “Accept” when prompted by Java.
- Click the Browse button and locate your image. Once your image is located, click the Open button.
- Click the Upload button and the picture will be added to your folder.
- Click Continue.
- Once your image(s) are in your File Manager folder, click the Insert image into HTML link located to the right of your photo in your folder. The photo you choose will be inserted where you left your curser in step 1.