

Production Maintenance Complete for Sunday, April 20, 2025
All enterprise and business applications are in service at this time.
Portal Status: Green


In Outlook, attachments are limited to a total combined size of 20 MB. This can pose a challenge when attempting to send multiple files or a large file, such as a video or Photoshop project.
Additionally, large files pose an increased risk due to ransomware attacks that include phishing attachments and trojan files, which can potentially overwhelm the recipient’s inbox, and may create multiple versions of the attachment rather than one collaborative one.
Also, if you send someone an attachment, it can be forwarded to anyone — including users outside of the University of Colorado. If you share a document instead, you can control who has access, greatly reducing the chances that important or sensitive information slips out of CU’s cybersecure environment.
For these reasons, the Service Desk recommends sharing files via OneDrive, Teams or SharePoint.
OneDrive is a robust tool for file storage and sharing, offering features like automatic edit synchronization and the ability to set a document-sharing expiry date. Mastering OneDrive can be a valuable skill.
The files on your OneDrive are private until you share them. Keep in mind that when you share folders with Edit permissions, people you share with can add the shared folders to their own OneDrive. This lets them keep the folder alongside their own folders and items, easily move items between folders, and more easily work on it offline. Any updates they make sync with the shared folder, so everyone with access to the folder is up to date.
This option for sharing is best if you intend on sending an email invitation to people and want to keep track of who you invited, allowing for the quick management of access permissions for specific individuals.
1. Sign in to OneDrive with your cu.edu account.
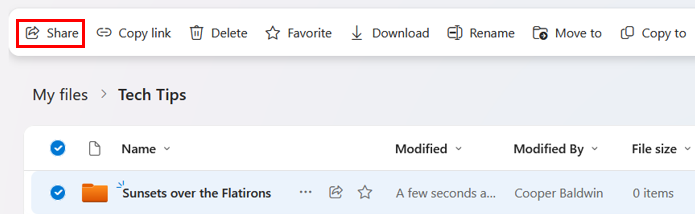
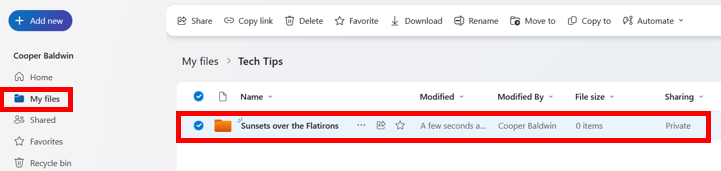
2. Under My Files, select the file or folder you want to share. Remember that only one file or folder may be shared at a time. If you want to share multiple files, create a new folder, put the files in the folder and share that.

3. Select Share from the toolbar.
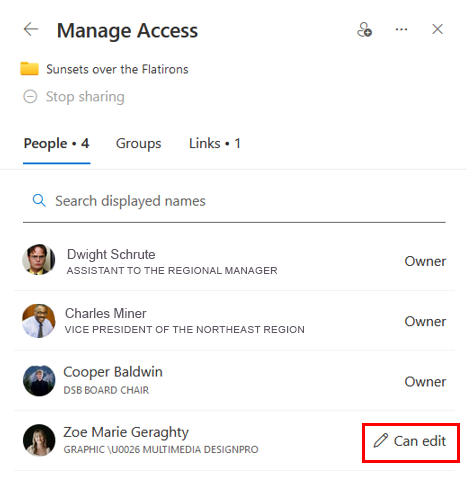
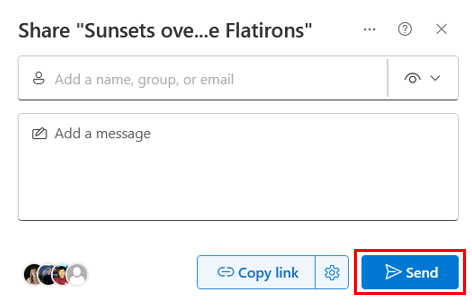
4. Enter the intended users’ email addresses. Click the user profiles in the bottom left corner to manage user access.
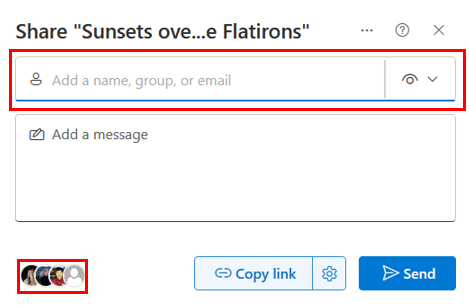
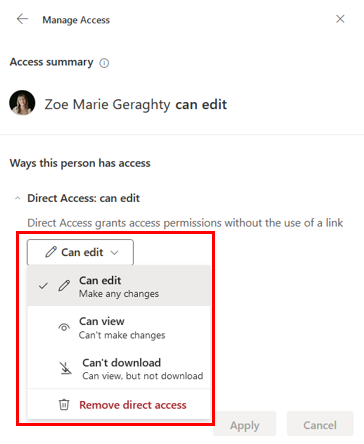
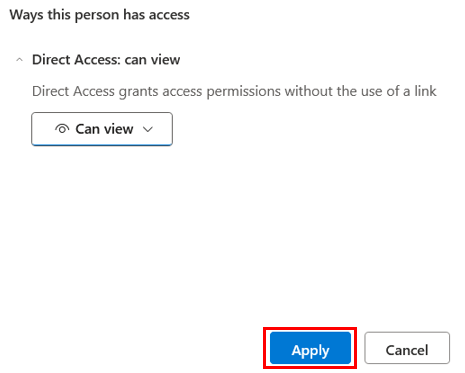
5. Choose the Can view option if you just want to share a read-only copy or Can’t download if you just want users to be able to view the file. The Can edit option is selected by default, allowing users to view, make changes and download the shared file.
6. Click Apply to save changes.
7. Click Send.
This option is best for sharing items with lots of people you might not even know personally, perhaps in an email or message. Anyone who gets the link can view or edit the item, depending on the permission you set. Users with the link cannot upload new items.
1. Sign in to the OneDrive website with your cu.edu account.
2. Under My Files, select the file or folder you want to share. Remember that only one file or folder may be shared at a time. If you want to share multiple files, create a new folder, put the files in the folder and share that.
3. Select Share from the toolbar.

4. Click the Settings icon to manage user access permissions.
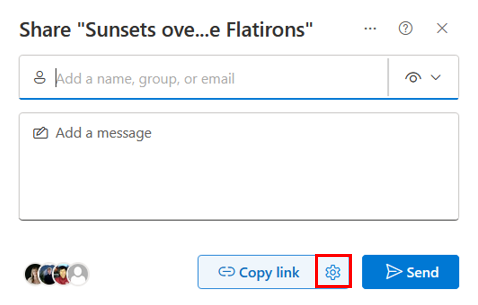
5. Customize the access permissions to your liking.
a. Anyone gives access to anyone who receives this link, whether they receive it directly from you or forwarded from someone else. This option is disabled.
b. People in University of Colorado System with the link gives any CU System employee who has the link access to the file, whether they receive it directly from you or forwarded from someone else.
c. People with existing access can be used by people who already have access to the document or folder. It does not change any permissions. Use this if you just want to send a link to somebody who already has access.
d. The Specific people option only gives access to the people you specify, although other people may already have access. If people forward the sharing invitation, only people who already have access to the item will be able to use the link.
6. Under More settings, select Can edit, Can view or Can’t download, depending on the level of access you want people to have. You can also choose to Set an expiration date, after which the link will no longer work.
a. For example, the folder in the image will be shared via a link, is accessible and editable by all employees in the University of Colorado System and will expire on Friday, Aug. 16.
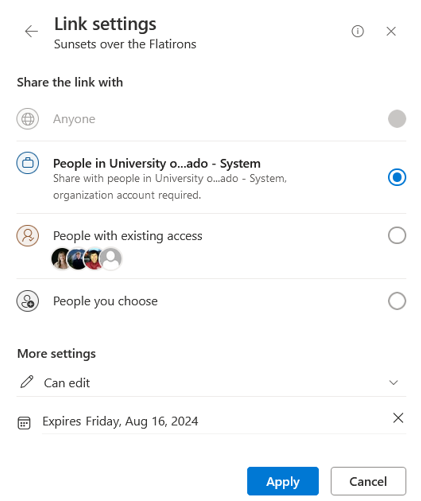
7. Click Apply to save your changes.
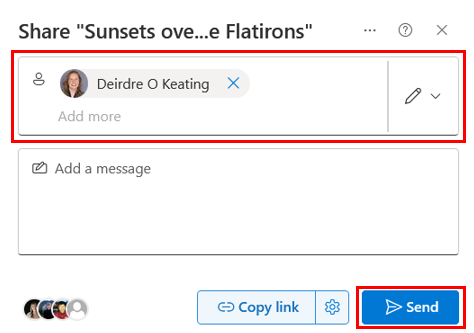
8. Enter the intended users' email addresses. Click Send.

Add new comment