Sends to Data Extensions with Profile Attributes
NOTE This task requires the assistance of your eComm Specialist.
Personalization is a great way to engage your constituents, but how can you ensure your Marketing Cloud profile attributes populate correctly when sending to a data extension?
What is a profile attribute?
A profile attribute is also commonly referred to as a data tag or a personalization string, such as first name, last name, email address, or even preferred phone number. Marketing Cloud users can select available profile attributes by clicking the silhouette icon in Content Builder and choosing their desired data tag from the drop-down menu.Additional tags can be requested through your eComm specialist, by adding the Salesforce field to the Report (instructions below) or importing a file to a Data Extension (if the data doesn't exist in Salesforce.
Follow these steps to ensure that your profile attributes populate correctly in sends to data extensions.
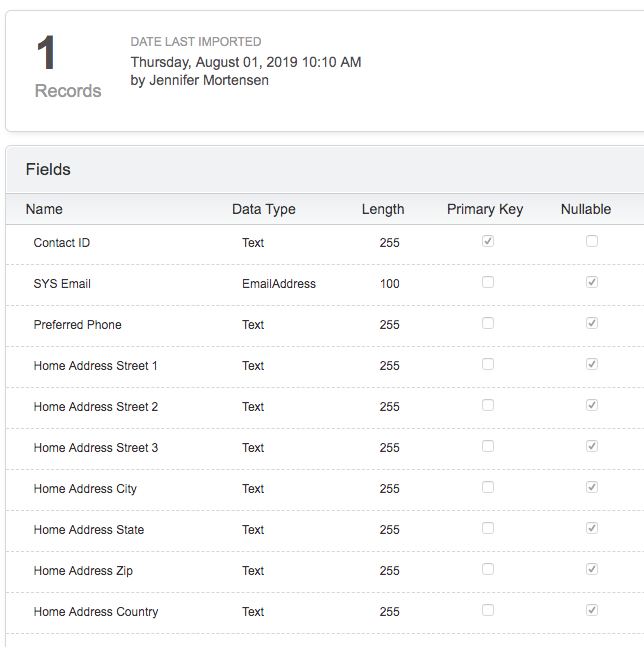
1. When creating your audience report in Salesforce, ensure that the columns that contain your desired data are included in the report. For example, we normally include contact ID, first name, last name, and email address when creating reports for data extension sends, but in this case, you'll want to add the additional data fields you desire as well (such as city or state, for example). When you are finished adding columns, save your report.

2. Next, create your data extension. Note: If you already have a data extension created that does not contain the columns you desire for the send, you'll need to create a new one. Overwriting an old data extension will not populate the desired data fields. You can learn more about creating a data extension in this article.

3. Import your data extension.
4. Ensure that the profile attributes you've built into your data extension are correctly mapped from the silhouette drop down menu in Marketing Cloud. The names must be an exact match in order for the data to populate correctly.

5. It's a good idea to do a few test sends to ensure that your data is populating as expected before completing the send to your intended audience.


