Sending a Test Email
Testing is a key but often overlooked element of email marketing, but we've all seen the results of this missed opportunity:
- Images that don't appear the size they should
- Text that is unreadable in mobile
- Buttons and links not working as you planned
Prevent trouble by testing your email before your final send.
To test your email in Marketing Cloud, complete the following steps:
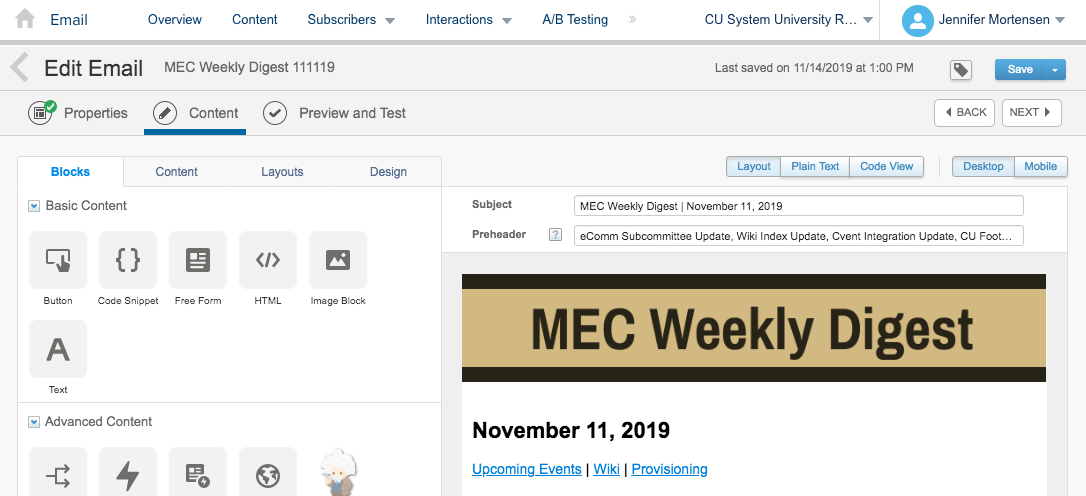
1. When you're finished making final edits to your email on the Content tab, click the next arrow in the upper right hand corner of the screen to access the Preview and Test.

NOTE In the Preview and Test tab, if you scroll to the bottom of your email, you'll notice a default Marketing Cloud footer appearing with a blue cloud logo. That footer appears in the Preview and Test tab only and will not appear in your test email nor in your actual email send. However, be sure that your delivery profile contains the CU Footer for All Emails if you are sending a commercial communication.
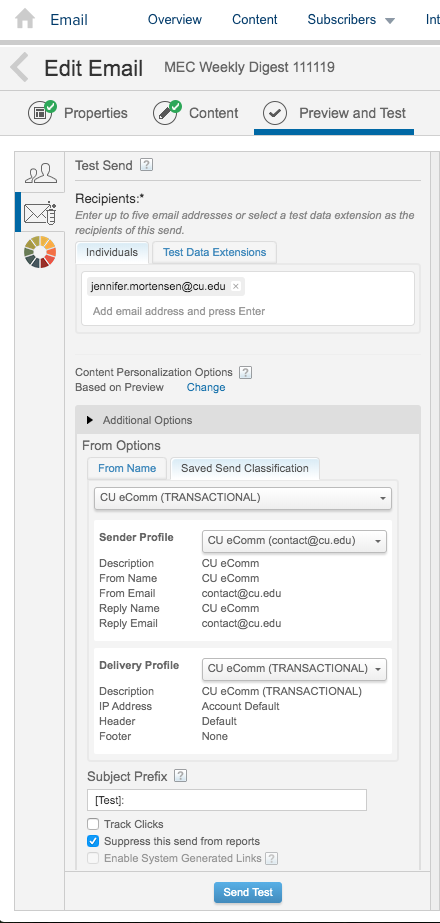
2. On the Preview and Test tab, click the envelope with the test tube to begin configuring your test send.
- Select the Individuals tab
- Type the email addresses of up to five people in your test audience (hit enter after each one to add)
- Select your send classification, sender profile, and delivery profile
- Enter any prefixes for your subject line; the default will appear as [Test].
- Uncheck Track Clicks
- Check Suppress this Send from Reports

3. Click Send Test when you are finished. You'll receive a confirmation message in Marketing Cloud, and your test message should appear in inboxes a few minutes later.


