


Use Marketing Cloud Data Extensions
Data Extensions is the term Marketing Cloud uses for an audience. Learn how to interact with Data Extensions after they have been created initially.
Re-Start Data Extensions
Why re'Start' Data Extensions?
Data Extensions MUST be re‘Start’ed before every email send because they capture a Salesforce Report at a moment in time. If you fail to re’Start’ your Data Extension, your email will be distributed to an out-of-date audience. An outdated audience will result in:
- not targeting your intended audience
- If your audience includes current employees or students, re’Start’ing your Data Extension ensures new employees/students are included and those who are no longer employed/enrolled are not
- If your audience includes alumni, re’Start’ing your Data Extension ensures new alumni (or recent graduates) are included
- distributing to inaccurate email addresses
- in cases where someone recently updated their email address
How-To re’Start’ Data Extensions
Re-Run Data Extension | 13 sec. video
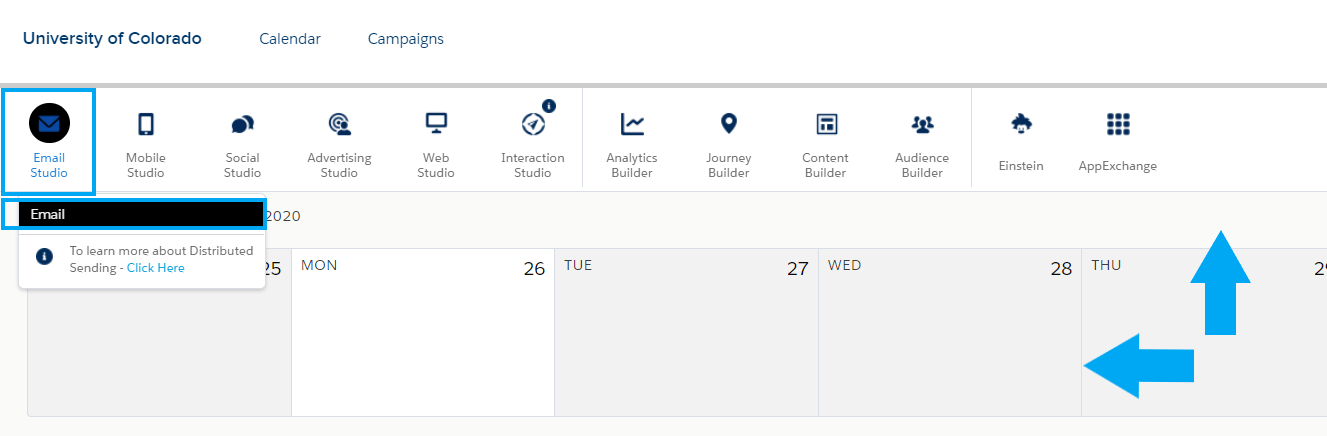
- Navigate to Email Studio > Email
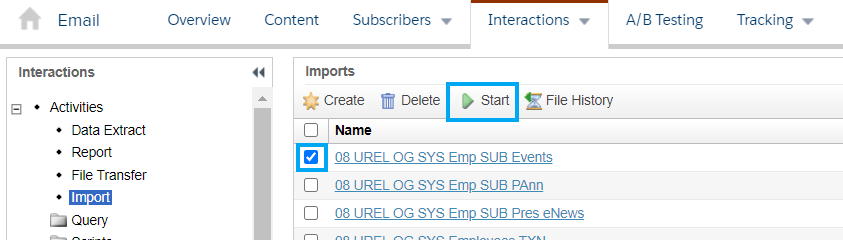
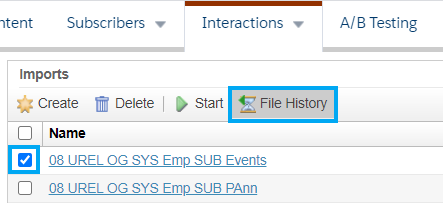
- Hover Interactions in the navigation bar then select Imports

- Click the check boxes in front of each of the imports (data extensions) you will use for your email.
- Click the Start button in the navigation bar.
Notifications
Set Data Extension Notification | 13 sec. video
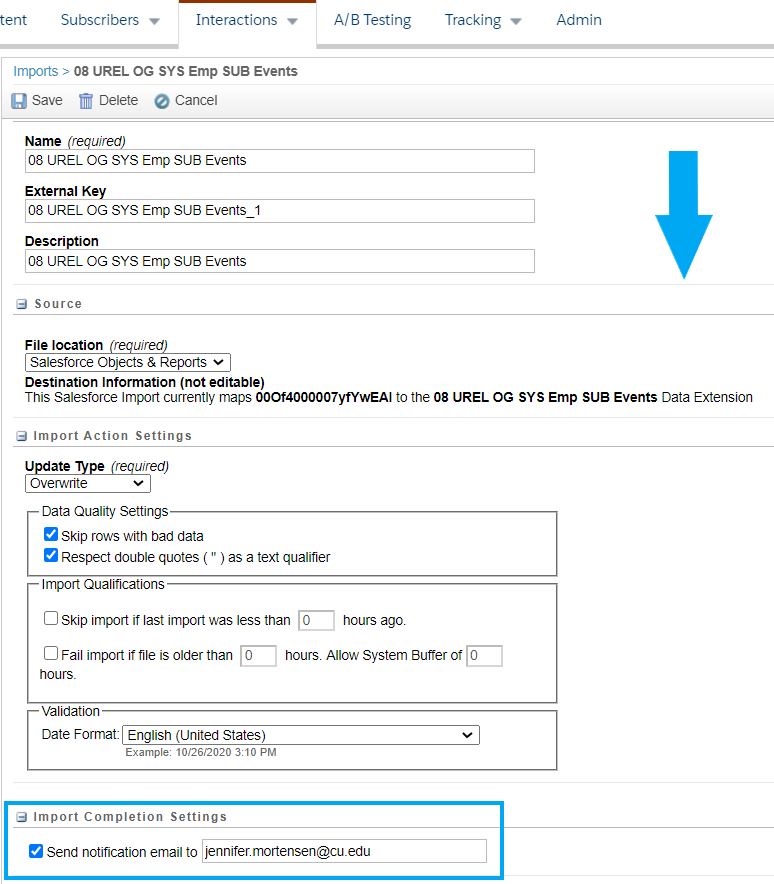
If the Data Extension lists your email to receive notifications about updates (see below), you should receive a notification email confirming the Data Extension ran successfully or not. If your import failed, ask your eComm specialist for help.
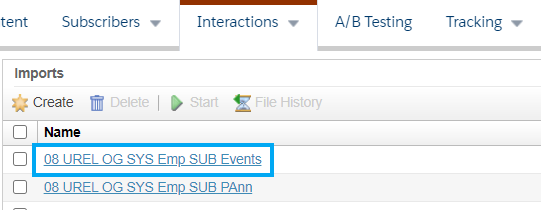
- Click the Data Extension title to open it
- Once open, scroll to the bottom to see who
History & Status
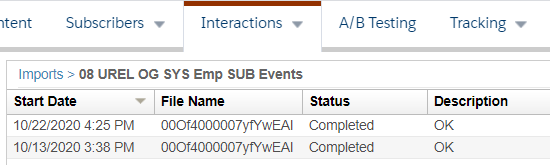
- You can also see the status and history of the Data Extension import by checking the box next to the Data Extension and then clicking File History.
Find Data Extension's Corresponding Report
Every Marketing Cloud Data Extension is based on a Salesforce Report. Follow the tip below to find the corresponding Report in Salesforce, where you can also view all Contacts that are captured in the Report.
Step 1:
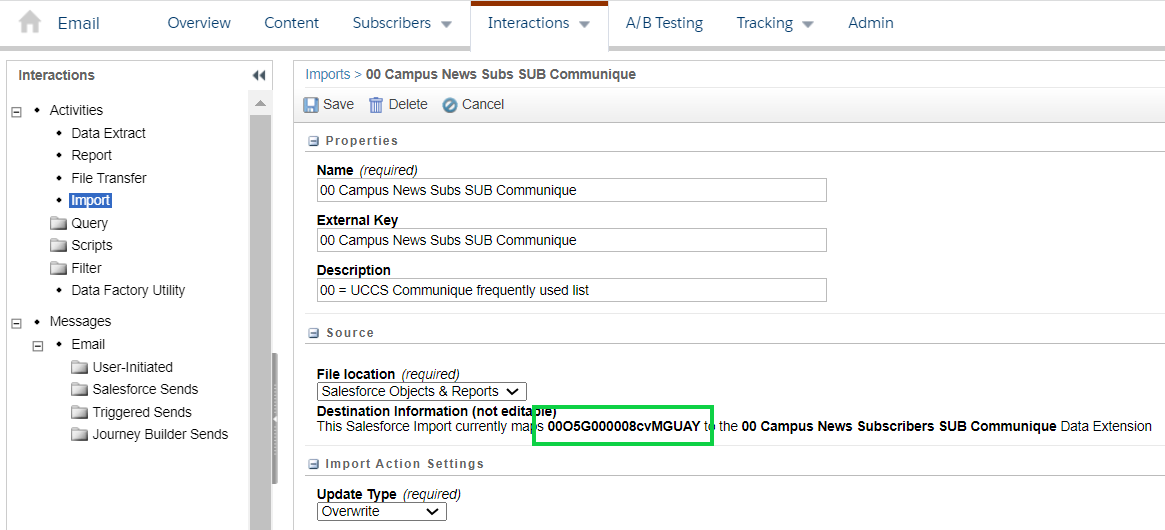
- From Interactions >> Import >> select Data Extension Name
- Once open, copy the ID of the mapped Data Extension
Step 2:
- Login to Salesforce
- Replace the following URL with the ID found within your Data Extension: https://cuecomm.lightning.force.com/lightning/r/Report/PASTE ID HERE/view
- The URL should look something like this: https://cuecomm.lightning.force.com/lightning/r/Report/00O5G000008byE6UA.... Note: This is an example of what the URL should look like, clicking on this link will take you to a report you may not have access to view.
Looking for multiple reports? After looking up your first report in Step 2, repeat Step 1 to find the report ID in the Data Extension and then simply replace the Report ID in the URL at the top of your browser.
