Organizing Your Work for Ongoing Automation Studio Sends
If you're hoping to use Automation Studio on a regular basis to streamline your recurring sends, you're on the right track. Automation Studio can help you save a significant amount of time and work, particularly for the sends that occur on a weekly or monthly (or other cadence) basis. For this example, we'll be looking at how the Office of the President organized work for the weekly send of CU Connections.
PRE-REQUISITES This wiki assumes that you've already read Scheduling Data Extension Imports in Automation Studio and Scheduling Salesforce Send Emails in Automation Studio. If you haven't yet reviewed those wikis, please do so before proceeding.
Salesforce Send Emails
If you're used to scheduling Salesforce Send emails, your Marketing Cloud Salesforce Send Email screen might look something like the example below: one Salesforce Email Send with a unique name for each send.
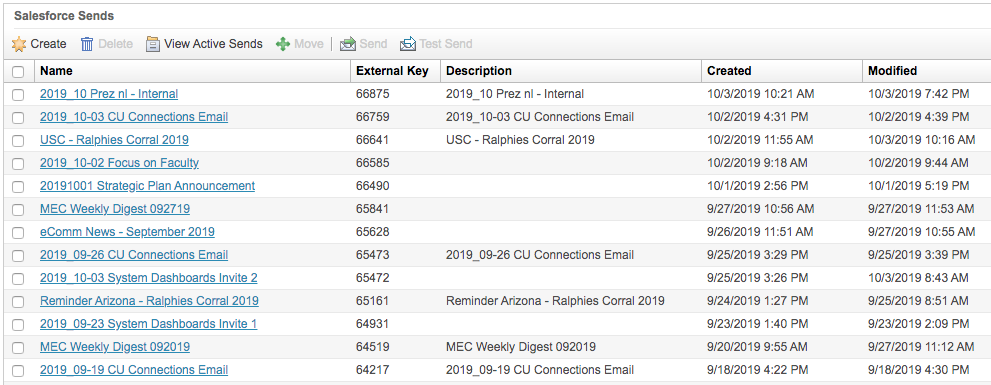
While this process does work, it's more complicated than it needs to be for sends that occur on an ongoing basis. For example, on the list above, you'll notice that CU Connections appears three times, each with a different date.
1. Instead of creating a separate list item for each email, you can create subfolders beneath the Salesforce Send Email parent folder. Just right click on the Salesforce Send Email folder in the left navigation pane, and then select New Folder and proceed to organize your work as desired. For this example, we've grouped our work into Monthly, Weekly, and Periodic Sends.
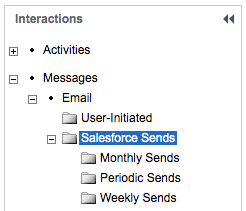
2. From there, you can create a new Salesforce send in the desired folder. For example, we created two weekly sends: one communication for CU's eComm Specialists, and other for CU Connections.

Build your weekly Salesforce Send Email as you normally would - select your audiences, your send classification, delivery profile, etc. For the content, just select the email that you last sent that falls into this weekly category. Since you aren't scheduling anything yet, there's no risk in connecting a previously sent message to your Salesforce Send Email configuration. When you're done, save your work.
3. When you're ready to complete a weekly send to the audience you created, modify your Salesforce Send Email so that it points to the correct content. You can also change the name of the weekly send to reflect the date associated with it. For example, we modified "Weekly Send - CU Connections" to "Weekly Send - CU Connections 103119."

REMINDER If you make ANY changes to your email content after saving your Salesforce Send Email, you'll need to re-select your content in the send configuration to ensure that the changes are captured.
Automation Studio Sends
Similar to how we organized our work in folders in Salesforce Send Emails, you can also organize your ongoing sends in Automation Studio. If you haven't yet created a folder structure in Automation Studio, the folders you will see are All Automations and my automations.
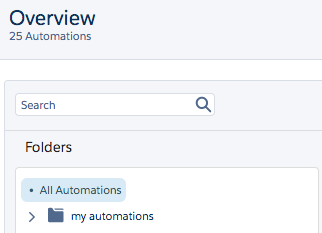
1. To create your own folder structure, right click on my automations to create a new subfolders or subfolders. In this case, we've labeled the folders so that they correspond with the category of send.
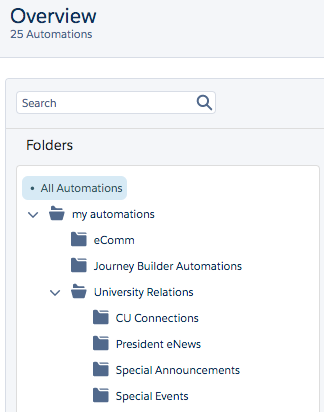
2. Within each folder, configure an automation that contains your audience, any exclusions (if applicable), desired wait time (if applicable), and a placeholder Salesforce Send Email that you'll link to your previously created Salesforce Send Email when you're ready to schedule and send.
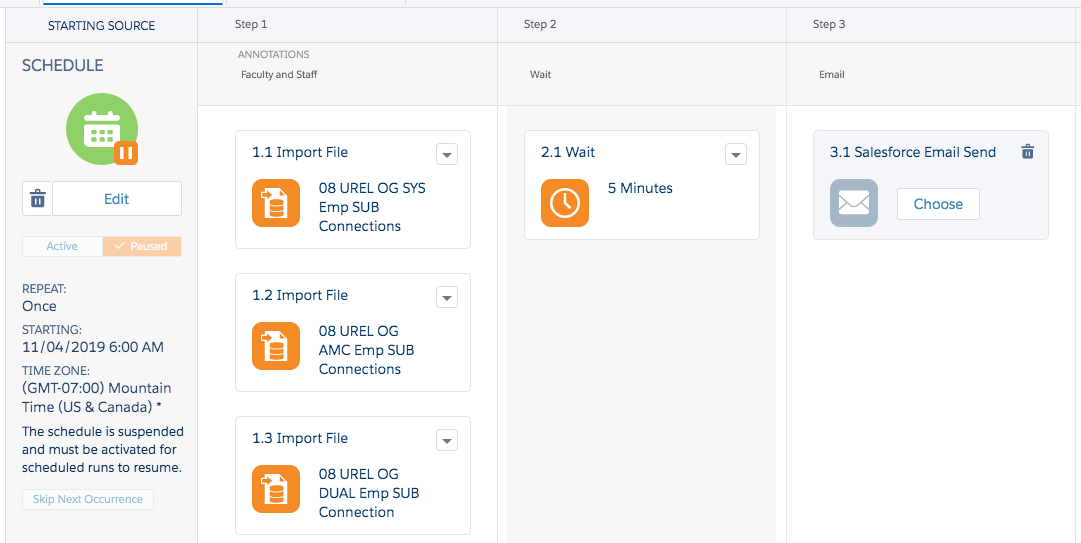
Linking Salesforce Send Email to Automation Studio Content
1. When you're ready to complete your email send, ensure that you have selected the correct and most up-to-date content in your Salesforce Email Send configuration.
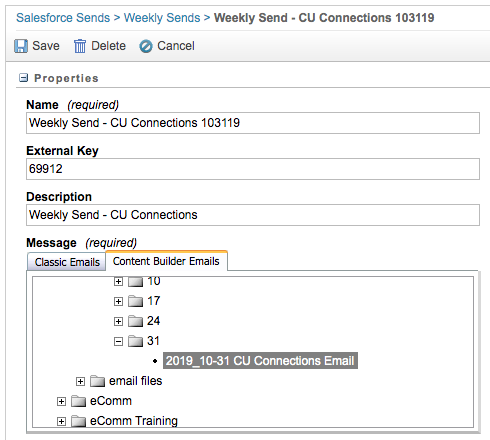
REMINDER If you make ANY changes to your email content after saving your Salesforce Send Email, you'll need to re-select your content in the send configuration to ensure that the changes are captured.
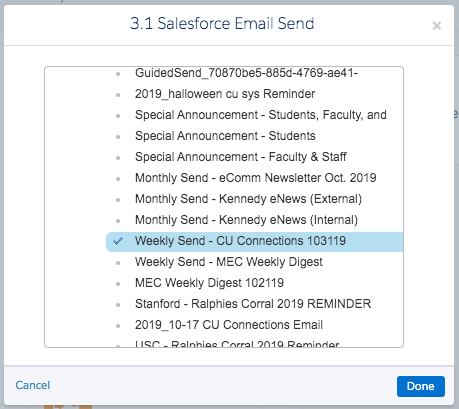
2. In Automation Studio, return to your weekly send and select the Salesforce Send Email you desire from the list of options that appears.
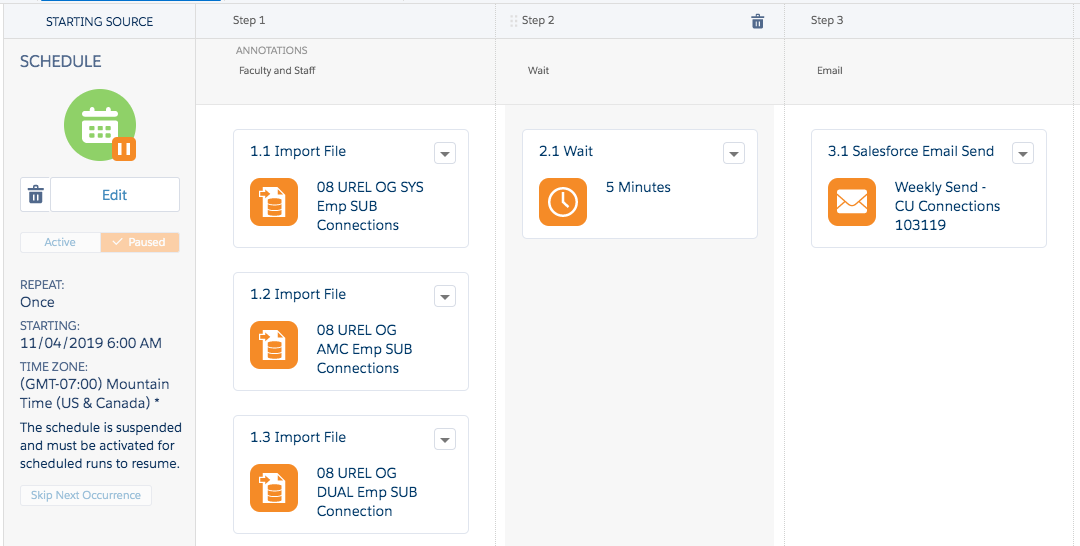
3. Complete scheduling your automation using the instructions in Scheduling Salesforce Send Emails in Automation Studio.


